Chevron nails! 

Hi guys! Today I have some cute chevron nails to show you! 

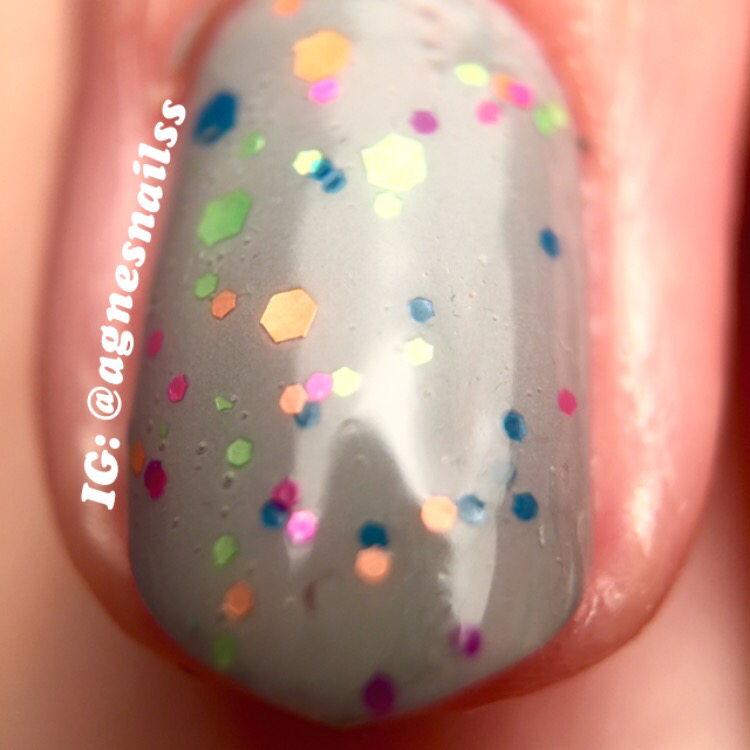
The polishes I used for this mani was opi ”angel with a leadfoot”, china glaze ”flip flop fantasy”, ”license and registration pls” and the famous ”fairy dust”. 

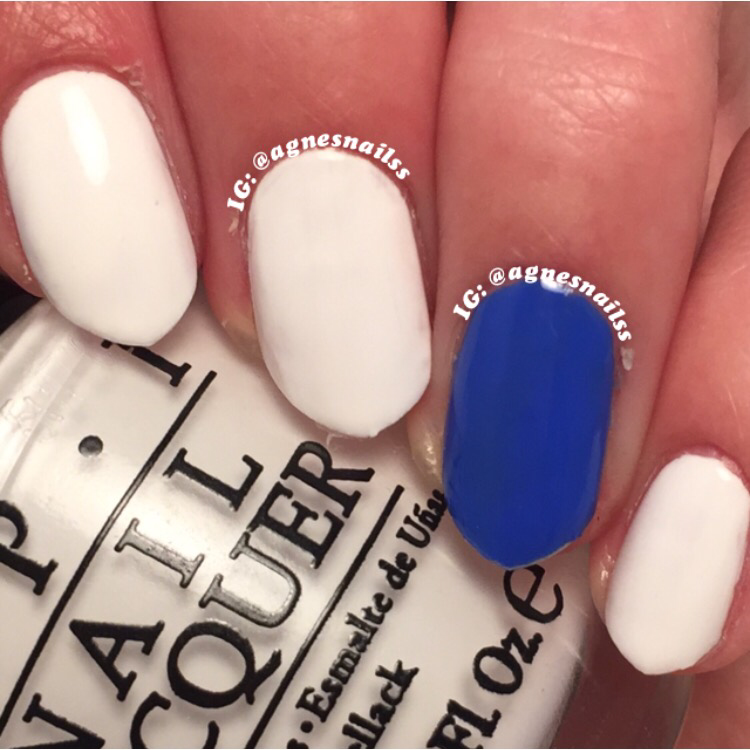
I used ”angel with a leadfoot” as my white base. I really like this white polish. Opaque in two coats. 

Here is my white base: 

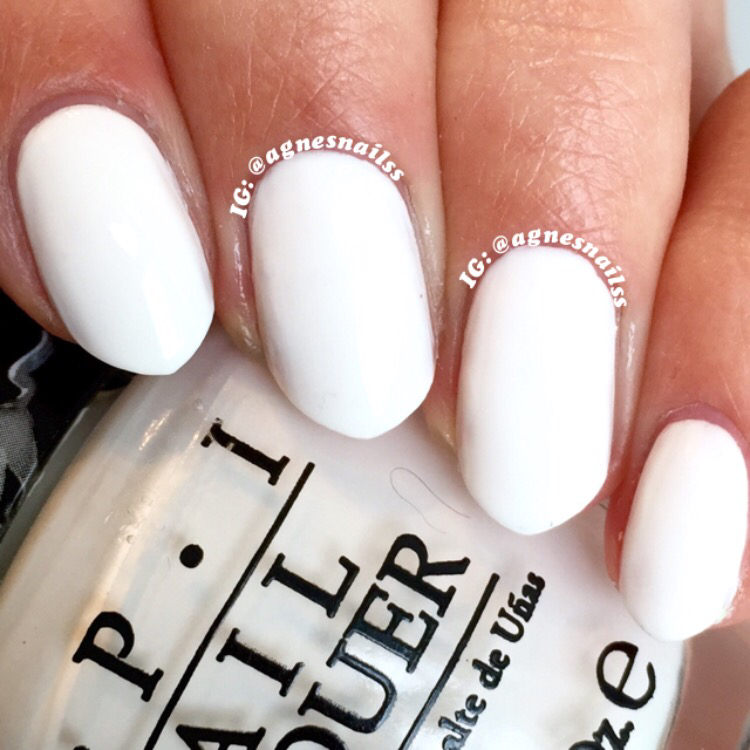
After this I added chevron vinyls from Twinkled T, and made some nailart! I love these vinyls, and you should all get some if you don’t own any already. 

But a reminder; always apply shiny magic (a fast dry top coat) before using any kind of vinyls. I use seche vite, and it has never let me down! 

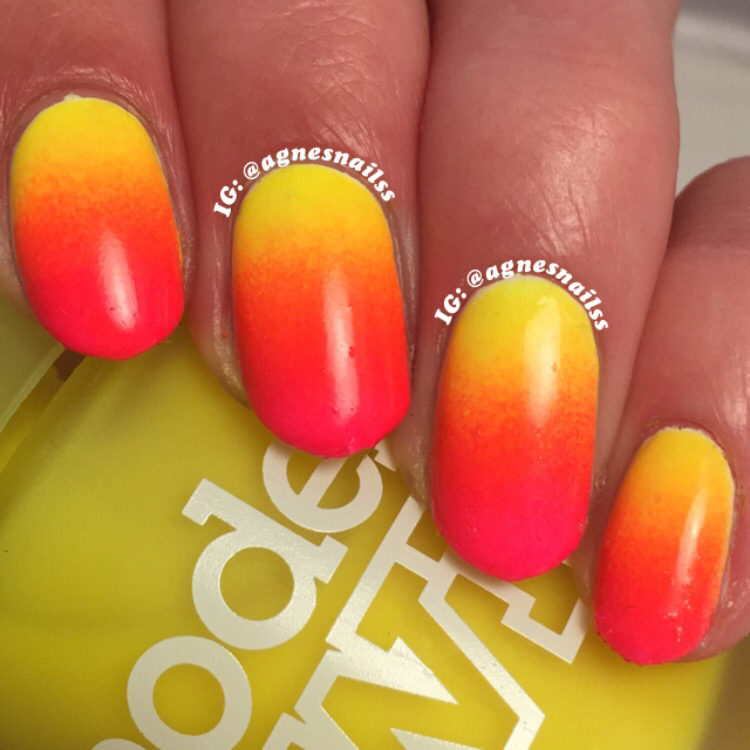
This is not the finished mani, but I thought it looked pretty, so here is a picture:   This photo don’t do ”flip flop fantasy” any justice at all, it’s a lot more neon and fabulous in real life. It’s amazing! 

After that I did basically the same thing a agin with blue and applied some fairy dust! 

Here is the finished mani:  

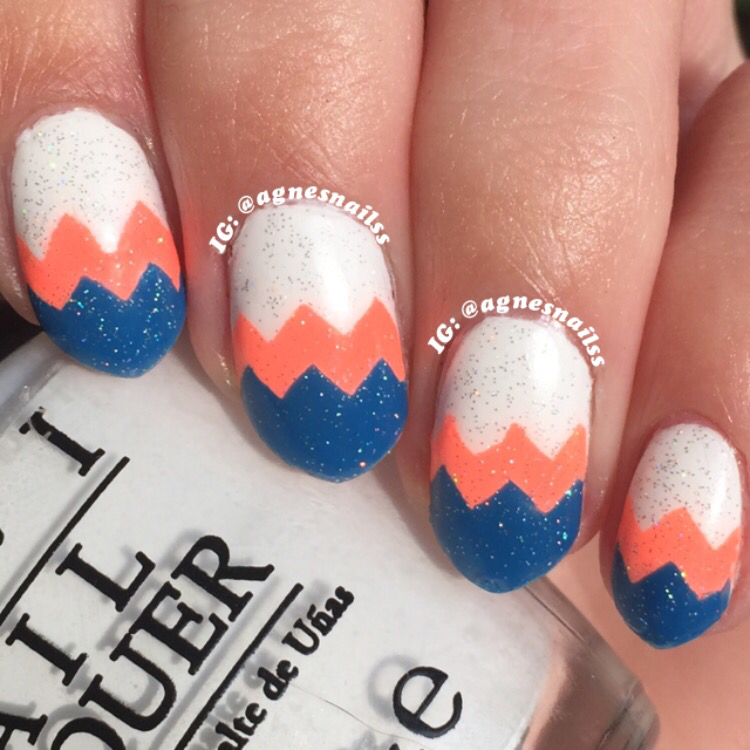
I really like the result, I think it’s cute and neon and sparkly, so pretty! 

Tell me what you think!

Here’s the tutorial:

 Instructions:

1. Paint your nails white and apply shiny magic before using vinyls. Wait 15 minutes or so.

2. Apply vinyl 1/3 down your nail.

3. Paint with neon orange on the lower part of your nail. 

4. Remove vinyl as soon as possible using tweezers.

5. Apply shiny magic again and wait 15 minutes. 

6. Apply vinyl over the top orange part. 

7. Paint the lower part of the nail using a blue polish. 

8. Again, remove the vinyl as soon as possible.

9. Wait for everything to dry.

10. FAIRY DUST!

11. Shiny magic. 

Done! I hope you enjoyed this blog post, thank you for reading.

Glitter!!!!

short and weird blog post. I just had to share with you all the beauty of the glitter polish ”point me to the party” by China glaze!

Here it is: 

 in this picture I put it over OPI ”cement the deal”. It’s such a pretty glitter! So colorful and fun! It’s one of those ”I was in a hurry but didn’t want plain nails” polishes. Love it!

  It’s really such a fun and cute polish. 
And I also took some pictures using my macro lens! I really enjoy taking macros lol.

   As you can see, this polish consists of matte glitters in various sizes. The colors are blue, green, orange, pink and purple! 
 Sooo pretty!

Marble and Maserati nails!

hi guys. Today I’m sharing with you some AWESOME Maserati + marble nails!

If you don’t know what Maserati is, I’ll tell you. It’s a car brand. They also make boats, but mostly cars. They’re pure perfection. My dream car is a Maserati gran turismo. And ONE DAY I’ll get one myself… In honor I made Maserati nails. So here we go!

The polishes I used for this mani was OPI ”angel with a leadfoot” and Barry M ”damson”.

  
And Barry m ”damson” (the blue one) is a one coater! Yay!

On top of these I made some super pretty marble nails. I love this technique. It’s also called ”Saran wrap method”. You basically use Saran Wrap and wet polish. Awesome!

Here is the marble version:  

I really like the way this looks. It’s so pretty!

Now onto the Maserati logo. The logo is super cool and quite detailed, and it took me some time to paint, but I’m very proud of the result. I used my pure color 10 detail brush from the stylish nail art shop and also some white acrylic paint.

Here’s the Maserati version:  not perfect at all, but I still love it! 

Now onto the marble tutorial. I didn’t film when I painted the logo because it’s very hard to paint details while filming, and you can also figure out how I did that. I painted it. Lol.

Here’s the tutorial:

  
Instructions:

1. Paint your nails white and let dry competely.

2. Blob on white and blue polish.

3. While dry, take som Saran Wrap and marble it up, and you can add more polish and marble more until you like what you see.

4. Clean up around your nails.

5. Shiny magic.

Done! I hope you enjoyed this post, thank you for reading!

Sheer mani!

Hi guys! Today I have some subtle cute sheer nails to show you. They’re very simple, but I like them. Let’s get into it!

I used two OPI polishes from their soft shades collection from this year. The base is ”put it in neutral” and the cute glitter polish is ”petal soft”. 

The glitter is so unique, it has matte white and pink hexes and some bigger white flowers as well, so cute!

Here’s the mani:  

As you can see, this is a very simple mani. But I still really like it. It was so easy to do as well. 

Here’s the tutorial: 

 nothing very exciting and special lol.

Instructions:

1. Paint your nails using a sheer polish.

2. Paint one side of the nail with the glitter

3. If necessary, place a flower glitter where you want it.

4. Shiny magic.

done! I hope you enjoyed this super short blog post. Love you all, have a great day!

Beach nails

hi guys! Today I have some beach nails to show you. These took a lot of time to make, but I had so much fun doing them. And I’m very proud of the results, so let’s get into it! 

The day I painted these it was raining, it was cold and horrible, so I decided that YOU CAN ALWAYS IMAGINE. So I did. Lol

And I used a lot of polishes for this. A lot! I used OPI ”angel with a leadfoot”, ”toucan do it if you try”, ”can’t find my chezbook”, ”sorry I’m fizzy today”, ”you’re so vain-Illa”, ”honey Ryder” and I also used Barry m ”damson” and ”green grape. Phew. That’s a lot of polish. Lol

I first did a blue gradient representing the ocean… I really loved this gradient. Here it is:  

 And when I was done with the gradient I also did waves… This looks so pretty, it really looks like the ocean if you ask me. I’ll show you that version too:  

 And then finally I did the beach. I’m so proud of these! I hope you really like them too.

Here is the final result:  

 Okay, so as you might figured this design takes a lot of time, because of the huge mess it makes. First a gradient and then watermarbleish thing and then painting bla bla bla. But I promise, If you love to do nail art, this is such a relaxing nail design to do. 

Here’s the tutorial:   

 
Instructions:

1. Paint all of your nails white and let dry completely, I applied a fast drying top coat too, I would suggest that.

2. Apply liquid latex or peel off base coat all around your nails to protect from the very messy gradient! 

3. Put darkest – lightest blue shade on your sponge and gradient! Yay!

4. Remove liquid latex or peel off base coat using tweezers and apply some shiny magic.

5. Take a cup of room temperature water (prepare this a long time before you start so the water is the right temperature).

6. Drop white polish into the cup and then spray with perfume or body mist to make the wave looking effect. Since the body mist has alcohol in it this works very good.

7. Dip your finger in where you think it looks good

8. Clean up the mess and apply some shiny magic, again.

9. Take a nude sand colored polish and paint a beach at the end of your nails.

10. Using a dotting tool and two coral ish shades of polish, make a starfish.

11. you can also paint with a textured gold or nude polish to make it look more realistic.

12. Wait for everything to dry and then apply some shiny magic AGAIN.

Now you’re done and have beach ready nails! I hope you enjoyed this blog post, thank you for reading this far. 


Sideways French mani

hi guys! Today I have some kind of sideways French mani nails to show you. When I was done with these nails I thought: these look like rotten watermelon nails. When my parents saw them, they said: ooh water melon? And I was like: nah. Rotten watermelon sideways French mani, my friends. 

Oh well, not everything I do can be perfect. I still like them and think they’re pretty, but they kind of look like rotten water melon nails anyways. 

Here they are:

Rotten water melon sideways French mani. There you go! But this only looks like a rotten water melon because of the colors I used. But when I chose them I didn’t realllyyyy think about that. Whatever.

The polishes I used for this mani was OPI ”toucan do it if you try”, a Kiko polish without a name and a random silver striper polish. 

The grey might look black, but it isn’t black, it’s grey. FYI. 

I hadn’t used ”toucan do it if you try” in a while, and when I saw it sitting there in the shelf I just couldn’t stay away lol. 

Here’s a swatch of it:

 
I think it’s such a lovely color, bright and intense but in the same time kind of subtle. I’m not very much of a orange/red kind of person, but I love this color. 

Now onto the ”how” of the mani. I used some old vinyls for the sideways French/ watermelon thingy. A dotting tool from eBay, and yeah that’s basically it. 

Here’s a tutorial: 

 
Instructions: 

1. Paint all of your nails using OPI ”toucan do it if you try”. And let dry completely! I would also suggest putting a fast drying top coat over the nails you’re going to use vinyls on.

2. Place down the vinyls firmly into your nail to create the sideways French/watermelon thingy.

3. Paint the sideways French/watermelon thingy usin grey polish. 

4. Remove the vinyl asap! I used tweezers for this.

5. Make dots on all of your nails where there’s not a sideways French/watermelon thingy.

6. Then paint a line of silver glitter boarding the sideways French/watermelon thingy.

7. Apply some shiny magic when it’s all dry.

Now you’re done! If you’re going to do this: use actual watermelon colors or something that doesn’t look like watermelon colors at all, so that you don’t have to deal with the rotten watermelon thing. You’re welcome!

Bye, I love you all! 

Ikat nails!

Hi loves! Today I have some ikat nails to show you. I’m probably the last nail artist to do ikat nails, but you know what? IDC. 

I felt like doing them today, so I did. Yay! Mostly because they’re quite simple and you don’t need to focus like 100% for them to look good, like you have to with detailed work. This is just whispy lines and colors! 

Here they are:


I really like them, actually. They didn’t really turn out exactly as I wanted them to, but hey you can’t ask for that! I didn’t do the classic colors either. Those are blue and pink, but I find that way too boring so purple and turquoise it is. Yay! And some sparkle too, always.   

The polishes I used for this mani are China glaze ”my way or the highway”, ”what a pansy”, ”Pine-ing for glitter” and OPI ”angel with a leadfoot”. The black is acrylic paint!

These were easy and fun to do, and if you haven’t tried to do ikat nails yet, I would suggest trying!

Here’s the tutorial:

  
Instructions:

1. Paint your pointer and pinky turquoise and your middle and ring finger purple and let dry.

2. Apply some sparkles to your turquoise nails!

3. Paint white edgyish shapes on your purple nails using the polish brush. 

4. Paint turquoise inside of them, do the same shape but smaller.

5. Sparkle that shit!

6. Use black polish or black acrylic paint and a small detail brush to do whispy lines all around the white shapes as well as inside the turquoise shapes. 

7. Let everything dry and then apply some shiny magic!

now you’re done! 

I Joe

4th of July nails!

hi guys! Happy Fourth of July! I hope your day is filled with a lot of fireworks, food and friends. And nail polish! 

I personally love Fourth of July, even though we don’t celebrate it. Because duh Sweden. But I have family in USA, so I celebrate it by painting my nails. Yay! 

One time I were in USA at Fourth of July, and it was so nice. I wish I could go back.. OH WELL

Here is the mani: 

 
I did a quite simple mani, because I felt like it. I personally really like this mani. I don’t like red, but it’s fine as long as it’s americaaa.

The polishes I used for this mani are OPI ”romantically involved”, ”angel with a lead foot” and Barry m ”blue grape”.

I used a dotting tool from eBay for my dots and my pure color 10 detail brush from a the stylish nail art shop for the stripes.

Here’s the tutorial:

  
Instructions:

1. Paint your nails using red white and blue. I painted my pointer red, my middle and pinky blue and my ring finger white.

2. Make white dots in your middle nail using a small dotting tool. I would suggest dipping the dotting tool after each dot to get the most even results. 

3. Make red strupes on your white ring finger nail Using a thin detail brush like I did or a striping brush. 

4. Correct any mistakes using white polish and cover up any red polish that went against your will all over da place. 

5. Apply some shiny magic to seal in your design. 

Simple as that, you’re now done!

I hope you enjoyed this blog post, thanks for reading!

Bright leopard nails!

Hi guys! Today i have some fun leopard nails to show you. I used my favorite colors too: Turquoise and pink. Yay!

I love leopard print! You can do it in whatever color combination you want, different sizes, and it’s fun and easy to make!

I haven’t been very creative lately, and that’s when I do leopard print. Because it always works!

Here is the mani:

IMG_1759

I liked how this turned out, I think it’s super cute!

The polishes I used for this mani was China glaze ”Too yacht to handle”, OPI ”Suzi shops and island hops” and also OPI ”Who are you calling bossy?”. Too yacht to handle is and has always been one of my favorite polishes. I just don’t really use it that often. It happens that you forget about your babies when you have too many. (Big family problems).

Here is the tutorial:

Instructions:

1. All about that base, bout that base, no staining! Apply a base coat.

2. Apply base color. I used China glaze ”too yacht to handle”. Let dry.

3. Make blobs using a dotting tool and your second color. In this case I used OPI ”suzi shops and island hops”.

4. Using black polish and a smaller dotting tool, make some lines boarding the blobs and leave some gaps.

5. In the blank spaces, put some random black dots. (But I’ve got a blank space babyyy, and I’ll make a dot.)

6. Let dry and apply shiny magic!

DONE.

I hope you enjoyed this short blog post. I’m super tired, sooo BYE. Have a great day<3

Neon gradient and tribal heart!

Hi guys! I hope you’re all doing well. Today I have some AWESOME. VERY MUCH WOW nails to show you all! I hope you’ll like them.

It has been quite rainy and not very good weather in Sweden lately, so I decided to do some bright summer-nails, and just imagine it being sunny and warm.

SOO I did a gradient using two polishes from models own, and they’re VERY bright when put over a white base. SO THAT’S WHAT I DID!!!

I used models own ”Bubblegum” which is a super bright neon pink, and also ”Luis lemon” which is a highlighter bright neon yellow!

So here is the gradient:

IMG_1550And as you can see this picture doesn’t really do justice to the mani, it’s more pink and more neon. But it’s also very orange since it blends.

These polishes are both very jelly consisted. Its very nice to do a gradient with these, they blend very well and are super smooth.

Well here is the tutorial for the gradient:

Instructions:

1. Paint all of your nails white, apply a fast drying top coat and let dry completely! (I used OPI ”angel with a lead foot” as my white base)

2. Apply peel off base coat/liquid latex around your nails for easier cleanup. I applied two coats for the ultimate peel.

3. paint your colors onto a makeup sponge and SPONGE AWAY! Do this multiple times if needed, and make sure your sponge doesn’t dry. 🙂

4. Take some tweezers and do the magic peel! YAY!

5. clean up any polish if necessary.

6. Apply some shiny magic.

When I was done with the gradient, I felt like i needed more. They were so boring.

I chose between doing dots, hearts or tribal. But then I realized I could do them all!

So I did some black dots and a accent nail with a tribal heart! Here’s the result:

IMG_1601

I really like the result. I did the dots using OPI ”who are you calling bossy?” and a dotting tool from ebay, and the heart was done using acrylic paint and my pure color 10 detail brush from the stylish nail art shop.

I really like these, they’re tough, cute, neon and tribal. Yes. Love! What do you think?

Here’s the tutorial for this part of the mani:

Instructions:

1. Make dots using black polish and a dotting tool. Yay! Dip your dotting tool into the polish after every dot for the most even, best results.

2. Make the heart using black acrylic paint and a detail brush. If anything gets where you don’t want it you can just take a toothpick/ small dotting tool and scrape it off! Easy.

3. Do some tribal in that heart!

4. Apply shiny magic. I use seche vite.

Thanks for reading! I love you all. 🙂 ❤